
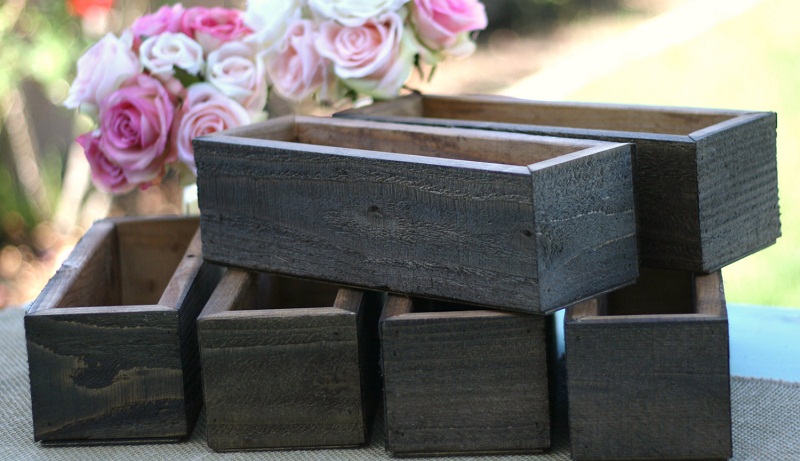
A beautiful blooming balcony or window sill is a wonderful decoration for the façade of the house. In order to decorate your home with fresh flowers, you need to buy or make containers with your own hands.
How to make wooden flower containers, we will consider in this article.
Flower lovers should know what an important role weather conditions play for flowers, especially for those plants that grow in a pot. We must pay more attention to potted plants than to those that grow outdoors. Namely: watering 2 times a day (early, evening), regular feeding (for lush flowering); protection from the scorching midday sun….
- Wooden containers do not deform in the sun;
- Wooden containers are more durable( do not break or crack);
- They can be painted in the desired color;
- Wooden containers, do not heat up as quickly in the sun as plastic containers;
- Plants in a wooden container stay moist longer;
Advantages of a wooden container
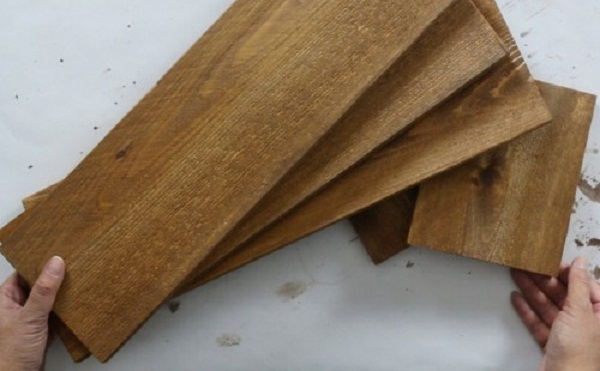
Required materials for a wooden container
We recommend that you prepare all the necessary tools and materials in advance, so as not to be distracted by their search later.
- На потрібно:
- plywood, board, the thickness of which must be at least 2 centimeters;
- wood paint;
- metal angles;
- screwdriver, or screwdriver with drills;
- screws, nails
- wooden slats;
- Ripsaw;
- PVA glue to wood;
- Roulette;
- pencil.
After checking the availability of all tools, you can start working.
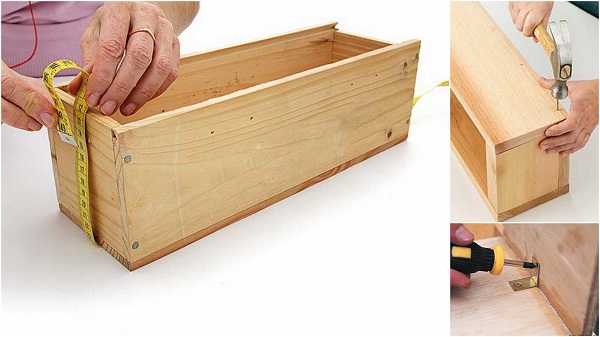
Work plan:
The size of the container depends on the needs of the grower.
First of all, you need to cut two rectangles out of wood. Their height should be 2 cm, and length = width of the container – legs for future pots.
Next, make two identical rectangles, 15-20 cm wide, the height of the pot(15-20 cm). They will serve as side walls.
Cut the front and back walls to the desired length, do not forget about the bottom for the container.
We also need 4 slats in the height of the pot, to fix at the corners.
Using screws and wooden slats, you need to assemble the box. A rectangular product is made up of the finished edges of the future box, and slats smeared with glue are installed at its corners – if necessary. After that, they are fixed with screws.
Inside, the box also requires fixation. Install the metal angles and secure them with screws. If you are making very long containers, fix another sidewall in the middle of it – it will significantly strengthen our structure.
Now you need to drill holes in the bottom of your future drawer. They will serve as a drain for excess water.
The bottom is fixed in the same way as the walls of the box.
When the pot is assembled, it must be smeared from the inside, with special protection against decay or covered with plastic wrap.
Ideas for using stones in the garden, video:
At the bottom of the box, a drainage system should be laid out, which will include pieces of foam and expanded clay, a layer of sand (3 cm).
Your box is ready and all you have to do is decorate it. Paint it in the color you want or paint it in different colors.
How to plant and how to care for plants in containers, read our article “Features of planting plants in containers” and “Caring for plants in containers”