
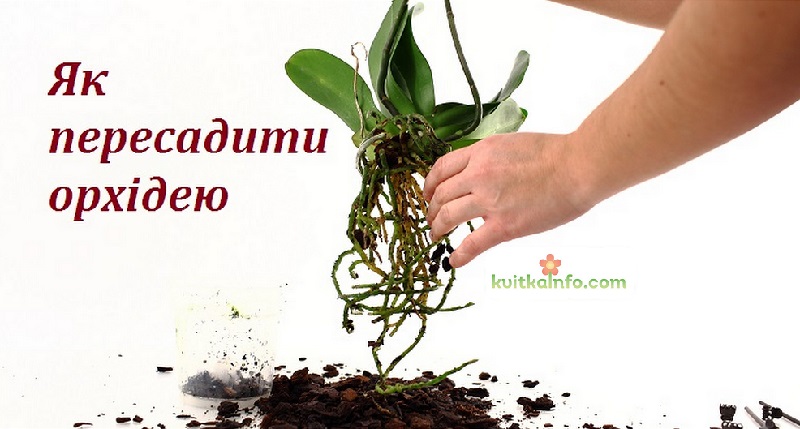
In this article, we will give step-by-step instructions on how to properly transplant an orchid. Phalaenopsis orchids need to be transplanted every 2 years.
When to transplant an orchid?
The Phalaenopsis orchid needs to be transplanted after flowering, during the period of active root growth (continuation of the root with green processes).
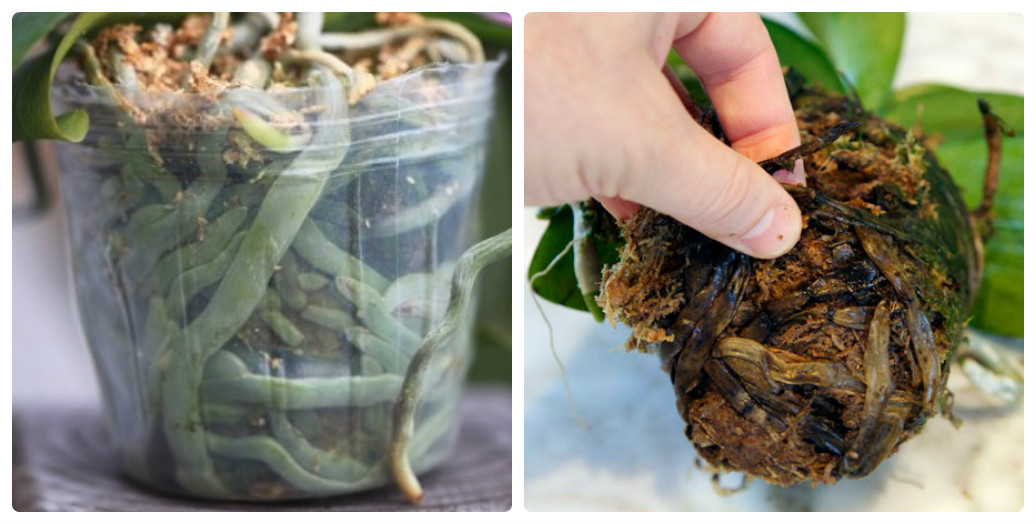
The reasons for transplanting an orchid are:
- the roots have outgrown the pot (the pot is cracked, the roots have grown from the holes in the drain of excess water).
- The substrate has changed its structure (the bark crumbles).
- The soil is not visible, only the roots themselves.
- The orchid is sick, the roots rot.
- The old soil is moldy.
- a lot of green and slippery algae.
- pests appeared.
How to properly transplant an orchid (Phalaenopsis) – step by step
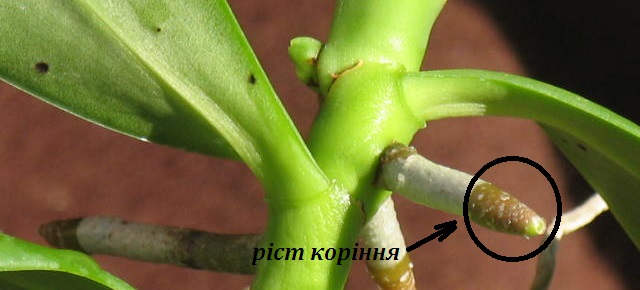
- A well-chosen time for transplanting an orchid (a period of active root growth) will ensure your success.
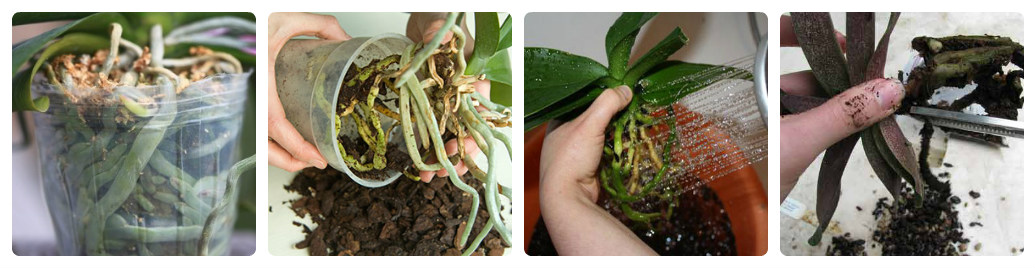
- We water the soil to transplant the orchid. The roots will become more flexible and will come out of the pot easily.
- Carefully remove the orchid from the pot, if necessary, cut or cut the pot so that the roots are not damaged.
- We transfer the orchid to a bowl to clean the roots from the bark. Very often, the roots of Phalaenopsisa take the shape of a pot, the roots grow in the direction where there is more moisture and nutrients. The best way to remove the bark from the roots and not damage them is to untangle and remove the bark with your fingers. It is best to do this procedure in water. Hold the stem with one hand and untangle the braided roots with the other. From time to time, it is advisable to drain dirty water. Rinse the roots with a shower, adjust the water jet so that the water does not damage the roots of the orchid with its force, but is strong and warm enough to wash out the substrate from the roots. If pieces of bark are tightly ingrained at the roots, then leave them as they are.
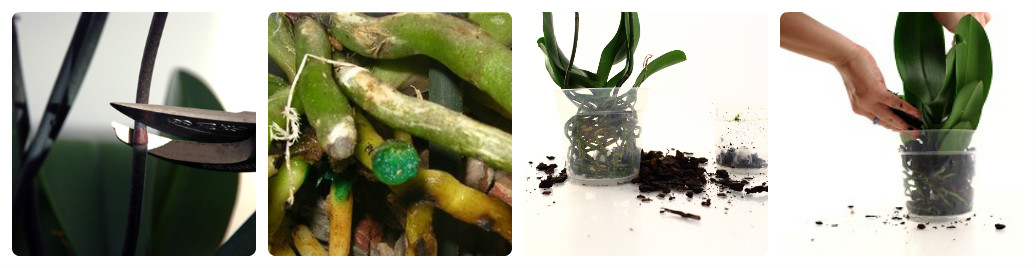
- We carefully inspect the roots before transplanting the orchid. We cut off the rotten and dry roots all the way to the healthy part, which is green or white. Very often we do not know where the orchid has healthy roots and where the roots are rotten. Regardless of their color (white, gray, green), healthy roots in Phalaenopsis (s) are solid and hard, and dead roots are empty and dry, when pressed, they shrink, sometimes water flows out, and the root shell peels off, exposing the root thread. We leave the broken roots, it will give lateral branches. When there is significant damage to the roots in the middle, we remove the damaged area and the healthy tip.
- Removal of old (yellow, rotten) leaves. To remove yellowed or damaged leaves (yellow or green), use the following method: cut it along the leaf vein (middle of the leaf), and stretch it by the ends in different directions, so we remove it from the stem. Together with old leaves, we also recommend removing yellowed or dry pedicels, leaving a small (0.5-1 cm) stump.
- At this stage, all places of cuts on the roots and pedicels (wounds) must be disinfected. Sprinkle with cinnamon, or crushed activated carbon, you can use an alcohol-free antiseptic (brilliant green).
- Dry the plant. Before planting in a pot, the orchid must be given a little time for its wounds (on the roots or leaves) to heal. In a warm room, where the air temperature reaches 25 degrees Celsius or more, leave for 2 hours. Don’t be afraid to leave Phalaenopsis without a substrate, it is an epiphytic species of orchid, with healthy roots nothing will happen in 24 hours. Only already dead tissues will dry out, and you will once again make sure that only alive and healthy roots remain.
Read also Orchids – orchid care
Choosing a pot, planting an orchid
- We choose a pot. The pot should be transparent, because the roots also receive ultraviolet rays. If we stuff the roots of the orchid into a pot, and 2 cm remains on the sides. empty space, such a pot suits us. Be sure to rinse the pot in hot water.
- Soil for orchids. The substrate (bark of hardwoods, moss) for orchids is sold in various stores, you can buy it without any problems. The finished mixture contains fertilizers and appropriate acidity, which are necessary for orchids. During transplantation, try not to touch the growing tips of the roots with your hands, they are very tender, they can turn black and deteriorate. If, before using the substrate for orchids, you smell rot or mushrooms, and see insects, such a substrate must be disinfected (boil for 5 minutes or pour boiling water, and leave for 15 minutes).
- We plant an orchid. At the bottom we pour a part of the substrate about 3 cm thick, put our orchid and carefully stuff all possible aerial roots. We fall asleep with a substrate. We put it in a permanent place.
Do not put the orchid in direct sunlight immediately after transplanting. They are under stress and can die from excessive heat.
Also Read
Propagation of the Phalaenopsis orchid by dividing the stem
Reproduction of the Phalaenopsis orchid “children”
Reproduction of the Phalaenopsis orchid: parts of the pedicel, division of the rosette, seeds
Orchid pests, how to deal with them


