
The share of wildlife within the apartment is what many residents of megacities dream of. If you are the proud owner of an insulated balcony or loggia, you have a chance to fulfill your dream of unity with Nature, at least to a small extent. The Bosch DIY Academy offers an idea to help make this happen.
The share of wildlife within the apartment is what many residents of megacities dream of. If you are the proud owner of an insulated balcony or loggia, you have a chance to fulfill your dream of unity with nature, at least to a small extent. The Bosch DIY Academy offers an idea to help make this happen.
. . . . . .
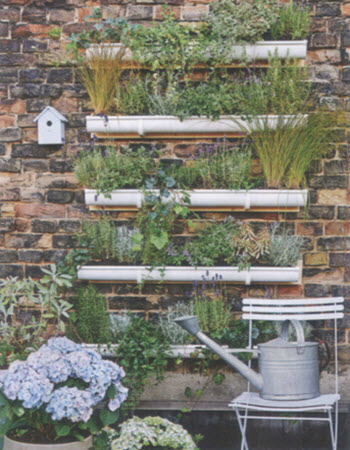
A vertical garden organized with your own hands is a great solution for those who are not yet the owner of a summer cottage. Flowers and plants can be grown at home, and all year round. And all you need is gutters, which are used as flower trays, several boards and fasteners. Plant installations will transform a boring and bare concrete or brick wall on your insulated balcony or loggia into a hanging garden with herbs, flowers or even lettuce. To do this, you only need to take a few steps.
1. The most important thing in this matter is cleanliness. It is necessary first of all to thoroughly wash the wall so that after installing the installation, nothing distracts attention from observing the beauty of plants. The easiest way to do this is with a pressure washer, which will gently and thoroughly clean the wall with a powerful current of water, making it impeccably clean and attractive. To simplify the process of marking holes on the wall, you should first drill the boards. In each of the five boards, at an equal distance from the upper and lower edges and at a distance of 20 cm from the edge on the right and left, two holes must be drilled using a wood drill bit with a diameter of 4 mm.
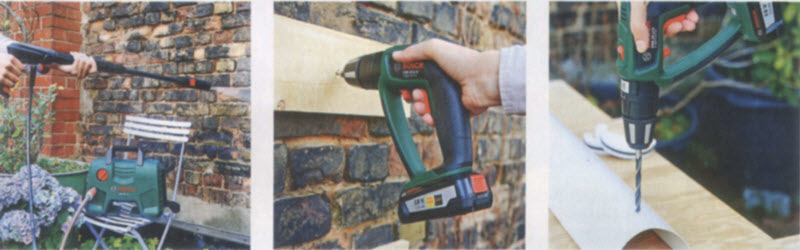
2. Attach the boards to the wall (aligning them horizontally). Next, with a pencil, mark points on the wall that coincide with the pre-drilled holes in the boards. Marking starts from the bottom board. The distance between the boards should not exceed thirty centimeters. The distance from the floor to the bottom board can be left equal to 35 cm. Shallow holes are drilled in the wall with a drill Ø 8 mm on concrete and dowels are inserted into them.
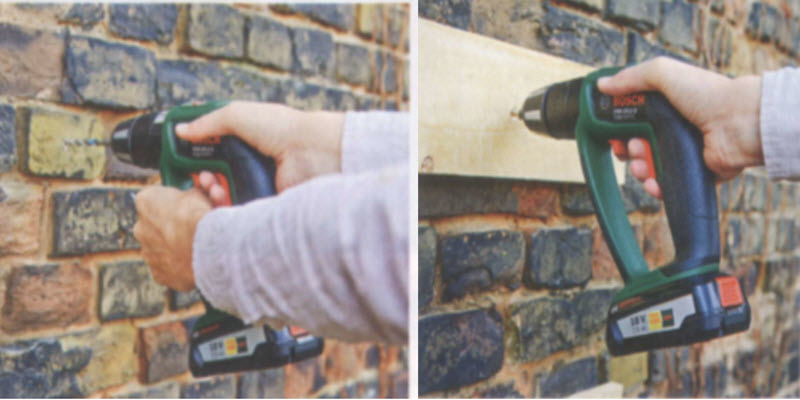
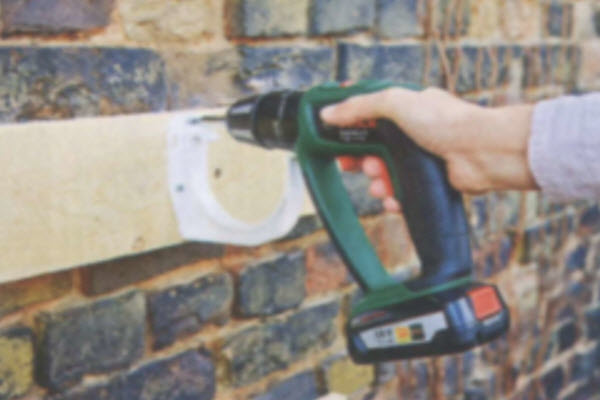
3. After making sure that all the dowels are securely held in the wall, they begin to fasten the boards. Here, the best tool is a drill driver. It can be used to quickly and securely fix boards on the wall, which will become the basis for attaching gutters.
4. Gutters must also be securely fastened. In order for the structure to be strong, it is necessary to mount two brackets on each board at a distance of 25 cm from the right and left edges using a cordless drill-screwdriver.
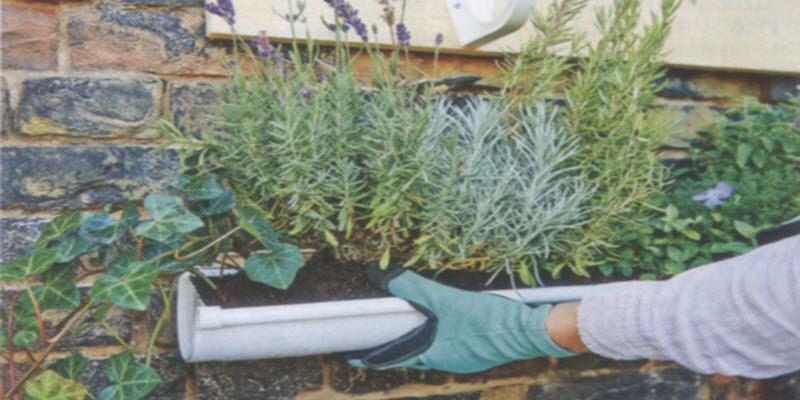
5. Next, the gutters are turned into flower trays. The rest of the water should flow out of the gutters. To do this, drill five holes in the bottom of each tray with a drill Ø 8 mm. The holes help drain excess water and prevent mold. Choose metal drills for both metal and plastic gutters (if you got just such). The plugs should be fixed on the sides, securing them with hot melt glue. Such plugs, depending on the brand and design of the gutter system, may be included in the delivery set. This is the end of the work, your vertical garden is ready!
6. It remains to fill the flower trays with soil and plant the plants according to your tastes. You can plant anything in your hanging garden, depending on the season and mood. Rosemary, lettuce, lavender… But we should not forget that each plant needs its own amount of space for growth.
It is necessary to water the plants in such a garden starting from the upper trays. Excess water through the drainage holes will drain to the lower tiers.
If the loggia is well insulated, a vertical garden will bring you joy even in winter. At the bottom of the gutters, before filling them with earth, it is necessary to pour stones, then the holes in the bottom will never be clogged.