
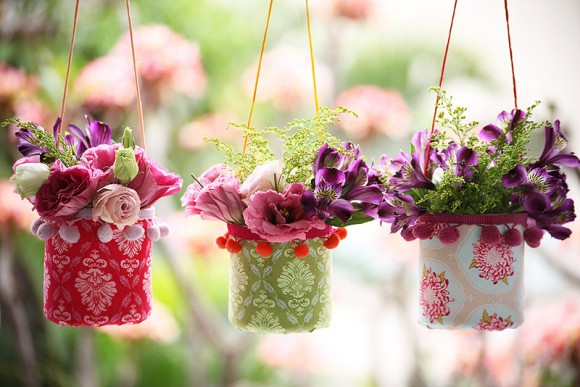
You can create an original and beautiful planter yourself. The planter is convenient precisely because it hangs in the air. It will not be on the path or stairs, and will not interfere with walking. During cleaning, you do not have to lift the planter, because it is located in the airspace. The planter can be placed in the middle of the house, using the free space. Also, the planter looks beautiful in the yard: on balconies, on tree branches, on the fence, and even on the wall. Planters can be placed anywhere, wherever you want to create a color scheme with flowers, without wasting usable space.
Planters made of plastic bottles
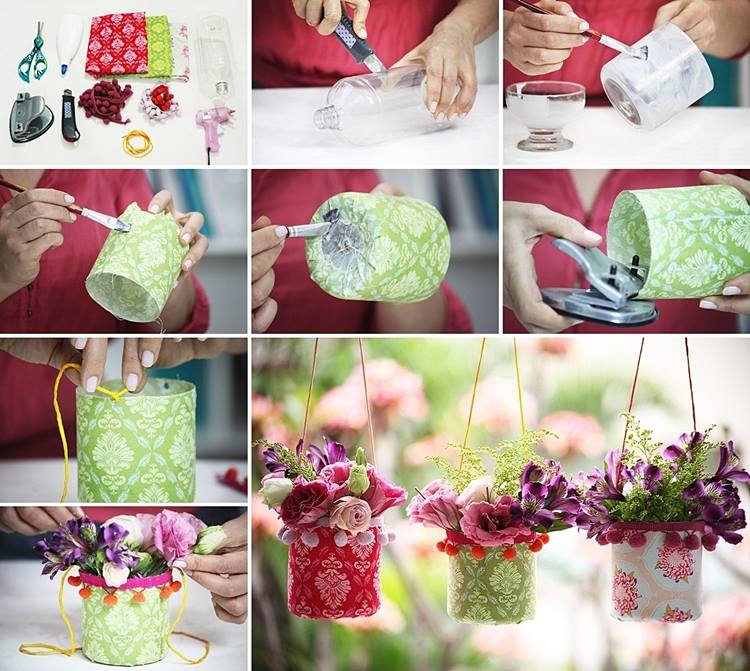
Materials for making planters from plastic bottles
Plastic bottle, scissors, glue and varnish for decoupage, napkins, decorative laces, clerical knife, hole punch, hot glue gun.
- Remove all stickers and glue from the plastic bottle, wipe the bottle with vinegar or alcohol (degrease the work surface).
- Cut the bottle with a clerical knife at the desired height. We make a drainage hole at the bottom of the bottle (with a hot nail). A drainage hole is needed only if the plant is planted directly in the planter, but if you use a planter as a vase, you do not need to make a hole.
- We apply glue for decoupage, apply a napkin (only a layer with a pattern), and again gently smear the napkin with a brush with glue, as if smoothing the napkin. Leave our planter for 4 hours to dry.
- Next, we make holes for laces with a hole punch, on which our planter will hang. Tie the laces.
- To decorate the planters, take hot glue and glue the decorative tape.
- Carefully plant the plants.
Our planter is complete.
Twig planter
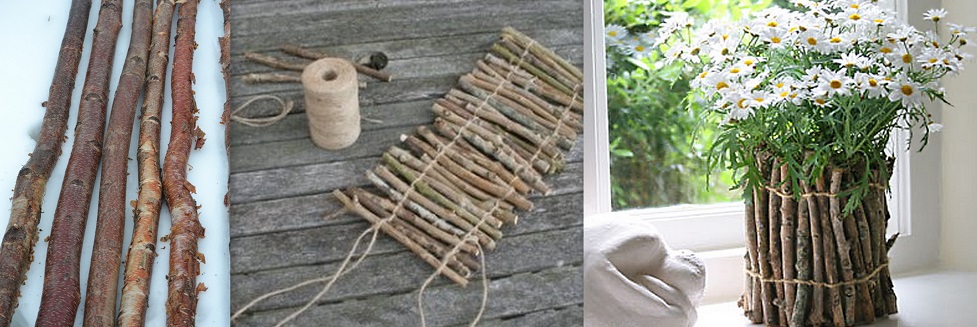
Materials and tools for creating a wooden planter
We use all the materials at hand: tree trimmings, cut branches from trees, planks, and other materials. To connect the wooden part, we need: a thin lace (brown, green), PVA glue, a hammer, small nails, scissors, a saw.
See also: Lavender can be pink, purple, white and even yellow.
Determine the size of the planter
- First we need to choose the smoothest branches 0.5-1 cm thick, clean them from small twigs. Next, cut twigs 20-30 cm long.
- We tie all the branches in turn to each other with a string, tie one simple knot on one branch, apply the next branch to it, knit another knot, and so on, we make knots on both sides, as if we make a fence that will bend in any direction due to a thin rope, then tie it. We get the basis for our future wooden planter, but this design lacks a bottom.
- The bottom is quite simple to make. Place 4-6 branches in the finished circle so that they lie on a rope braided around each branch. Thus, if you place a pot in a ready-made wooden planter, it will sit comfortably on a wooden bottom. In such a planter, you can put not only a flowerpot with a pot, alley a flowerpot without a pot, for example, cover all the walls with black agrofilm or sphagnum (moss), and plant the plant as in a regular pot. Sphagnum absorbs moisture well, so the earth will dry out more slowly.
We need nails in order to fix the bottom. They obliquely fix each branch of the bottom to the main structure so that the bottom does not break. We need glue and string for the exterior decoration of the planters, if necessary. With a string, you can rewind the planter several times, fix it with PVA glue, and glue bright décor (viburnum, mountain ash, cones…..) with hot glue.
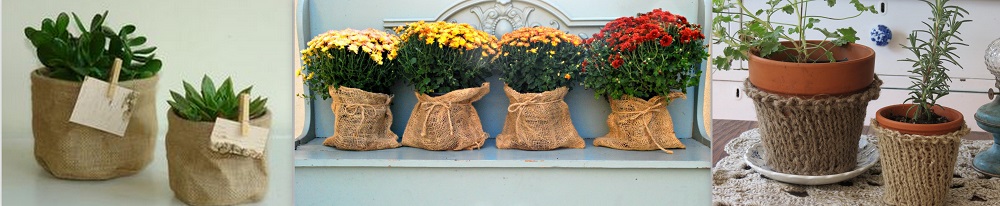
Original burlap planter
Burlap planters are very easy to make, it will not take much time. Burlap has always been a good and very nice material for decoration. A bag, or burlap fabric, can be found in hardware or construction hypermarkets.
A very simple version of burlap pots is small pockets in which you can simply put a pot with a plant, or sew a whole row of pockets and make a whole flower garden.
When making burlap planters, do not forget that this fabric is torn along the cut line, it is advisable to strengthen the edges (just fold the edge once or twice and sew them carefully).
Other types of planters
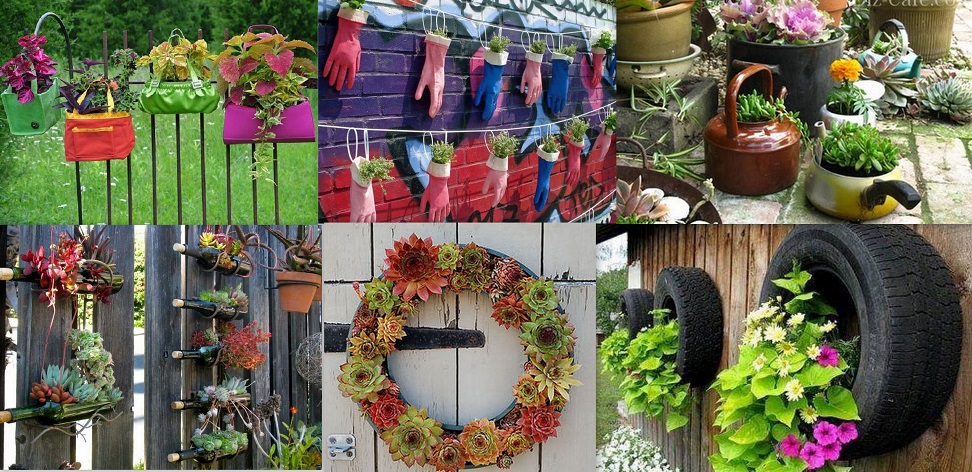
If you fantasize, you can make a planter from anything. It can be a delicate and elegant planter made of knitted napkins or fabrics that can be used to wrap a pot with a plant. It can be more rigid, high-tech style planters made of wire, chain-link mesh, ceramic planters, planters made of clay or gypsum (which, of course, already require a lot of experience and patience), planters made of foil, paper, cardboard, combined materials, planters from old bags. You can use car wheels, rubber boots, bags, sneakers and whatever. One has only to want – and you will definitely get something original. Feel free to experiment! Good luck with your work!
Note! In such pots, plant flowers with a small root system, or annual plants (petunias, surfinias, marigolds, brats, succulent plants, lobelia, ivy and many others).